



Reef Tank Basics
Akil’s Reef Start: The Professional Inoculation Method
Oct
By Akil, Modern Reef & Euro Corals
From dry rock to first coral: cycling, inoculation and water chemistry for a clean, stable, long-term reef
“A thriving reef’s success is built on the effort at the start. Taking the easy path threatens progress more than any hardship.”
Introduction: My Philosophy
Reefing is simpler than most people think. Many new reefers make it complicated by buying too much equipment, chasing new products and rushing.
This guide describes the method I use to start reef aquariums: a controlled inoculation cycle. I start with a clean base: dry rock, aragonite sand, low salinity and no livestock. Then I add only the organisms I want, in a fixed order:
Bacteria → microfauna → fish → invertebrates and copepods → coralline algae → corals
It’s harder at the start, and it takes more patience and discipline. But it gives you the cleanest possible start: no hitchhiking pests, no problem algae and no unwanted critters to fight later.
Work hard at the beginning so you work less later.
Part 1: Equipment. Start Basic and Proven.
Don’t buy lots of equipment, because you may not need it. A reef tank needs a few essentials, and they must be reliable.
| Equipment | Purpose | My Advice |
|---|---|---|
| Protein skimmer | Removes dissolved organics | Size it properly for your system |
| Lighting | Photosynthesis for corals and coralline algae | Use a fixture with a proven track record |
| Circulation pumps | Gas exchange, waste transport, coral health | Run them in random, non-synchronised mode to create turbulent flow throughout the tank |
| Heater and/or chiller | Temperature stability | Keep around 26 °C. Which one you need depends on your room temperature |
| RO/DI water unit | Pure water for mixing salt and top-off | TDS must read 0 |
| Auto top-off (ATO) | Keeps salinity stable. In this method it also raises salinity gradually | Essential to this method. See Part 6 |
| Refractometer | Measures salinity | Calibrate it with a 35 PSU calibration fluid, which should read 1.026 SG. Accuracy matters a lot at low salinity |
| Test kits | NH3/NH4⁺, NO2, NO3, PO4, KH, Ca, Mg, pH | Use reliable kits or a photometer |
| Mixing container with pump and heater | Preparing new saltwater | Needed for the full water change in week 1 (Part 4) and for all later water changes |
| Doser | Dosing the One-Liquid Solution and Reef Keeping System | Needed from Part 10 onwards |
| UV steriliser (optional, keep on standby) | Controls bacterial blooms | See Part 4 |
The Golden Rule of Equipment
For lighting and flow, always use what is proven to work, not new releases. A new product has no long-term track record yet. If you are new to the hobby, never test new equipment on your own tank. With proven equipment, your own learning is the only variable left. That keeps mistakes small and the lessons clear.
Do your own research and avoid unnecessary equipment. Every extra device is another thing that can fail.
Part 2: The Foundation. Dry Rock and Aragonite Sand.
Why Dry Rock?
I always start with dry rock. No fish, no corals. This gives me time to aquascape properly, with no livestock to stress and nothing dying on the rock.
Live rock is often sold as a shortcut. But it can bring in:
- Aiptasia and Majano anemones
- Problem algae (Bryopsis, Valonia, hair algae, Dictyota)
- Pest crabs, mantis shrimp and too many bristleworms
- Eggs and dormant stages of pests that may appear months later
Dry rock is harder and slower, but it’s the cleanest start. I prefer to add exactly what I need, rather than accept whatever lives on a piece of rock.
Practical note: Some dry rock can release phosphate and metals at first. Rinse your rock well, and test PO4 during cycling so you know your baseline before livestock goes in. Part 3 explains how this method flushes out early pollutants.
Why Aragonite Sand?
I start my tanks with aragonite sand. If you don’t like sand in the display, a sand bed in the sump (as part of a refugium) is a good alternative. In my view, nothing gives better biological filtration than sand, whether rock or any manufactured media. Here’s why:
1. Huge surface area.
Nitrifying bacteria live on surfaces as biofilm, so more surface means more bacteria. One litre of 1 mm sand contains over a million grains, which gives roughly 3–4 m² of surface per litre for bacteria to grow on. Halve the grain size and the surface area roughly doubles. Few other materials put so much surface in so little volume.
2. It filters in layers, from oxygen-rich to oxygen-poor.
- The top few millimetres are rich in oxygen. Nitrifying bacteria there turn ammonia into nitrite and then nitrate.
- Deeper zones have little or no oxygen. Here, denitrifying bacteria can turn nitrate into harmless nitrogen gas.
This means sand can run the full nitrogen cycle, including removing nitrate. Most bio-media mainly handle the first steps.
3. It renews itself instead of clogging.
Ceramic blocks, bio-balls and porous media get blocked by detritus and thick biofilm over time. Once that happens, only their outer surface really works, and their capacity drops. In a healthy sand bed, worms, copepods, amphipods, snails and other microfauna keep turning the sand, and water flow moves it. That keeps fresh surfaces exposed.
4. It’s a habitat.
Sand is home to the microfauna and infauna that are central to this method. They are the “micro armies” that recycle waste and compete with pests.
Maintenance note: A sand bed works best with good surface flow and plenty of animals stirring it. Don’t let it sit undisturbed under a layer of detritus.
Part 3: Water Preparation. Low-Salinity Start.
I start cycling at low salinity: 1.009–1.010 SG (about 12–13 PSU), with the temperature held at about 26 °C. Low salinity does three jobs in this method.
Salinity Units: SG and PSU
This guide gives every salinity value in two units:
- SG (specific gravity): how dense the water is compared with pure water. Most hobby refractometers and hydrometers read in SG. Strictly speaking, SG has no unit because it’s a ratio, so it’s written with “SG” after the number.
- PSU (practical salinity units): how much salt is dissolved in the water. In practice, 1 PSU is about 1 ppt (1 gram of salt per kilogram of water). Natural seawater is about 35 PSU.
| SG | PSU (approx.) | Where it’s used in this method |
|---|---|---|
| 1.009 SG | ~12 PSU | Cycling and hyposalinity (lower end) |
| 1.010 SG | ~13 PSU | Cycling and hyposalinity (upper end) |
| 1.011 SG | ~14.5 PSU | Upper limit for sensitive clownfish |
| 1.020 SG | ~26.5 PSU | Low end of typical store water |
| 1.025 SG | ~33 PSU | Full reef salinity (lower end) |
| 1.026 SG | ~35 PSU | Full reef salinity (target) |
Conversions assume a refractometer calibrated for about 25 °C. Small differences between charts are normal.
Reason 1: Better Conditions for the Cycle
In my experience, the nitrifying bacteria we need for cycling establish faster and thrive better at low salinity. Lower salinity water also holds slightly more dissolved oxygen, and nitrification needs a lot of oxygen. With no livestock in the tank, nothing is harmed.
Reason 2: Flushing Out Pollutants Before Livestock
New rock, sand, pipes, pumps and other parts can release pollutants into the water at first. These include phosphate and metals such as aluminium, lead and tin. Tin is a good example. PVC pipes and fittings are often made with tin-based stabilisers (organotins). Studies show these leach most in the first days of contact with water, and then the rate drops.
The first week of a fishless, low-salinity cycle is the ideal time to let this happen:
- pH tends to drop. Low-salinity water is diluted, so it has lower alkalinity and less buffering. The cycle also produces acid as bacteria convert ammonia.
- More pollutants stay in the water. At lower pH, rock and sand surfaces hold less phosphate and metal, so more of it stays dissolved. If pH drops far enough, the outer surface of the rock and sand can dissolve slightly and release what was bound inside it.
- Nothing is harmed. There is no livestock in the tank yet.
That’s why I change all the water once, at the end of the first week (see Part 4). A partial water change only removes part of what has leached. A full change removes almost all of it in one step, before it can be stored in the rock and sand. This full change is done only once, for the pollutants. All later water changes are partial.
The opposite happens when pH rises. As salinity, alkalinity and pH go up, rock and sand bind more phosphate and metal from the water. Phosphate binds to aragonite most strongly at around pH 8.4. The rock and sand become a store. That store can be released later:
- when pH drops, for example at night, in low-flow areas, or deep in sand where organics break down, or
- when levels in the water fall below what the rock holds, for example when you start lowering phosphate.
Every bit of pollutant you remove early is a bit that can’t be stored and released later.
Be realistic: Early flushing reduces the pollutant load, but it doesn’t remove all of it. Some rock keeps leaching slowly for months, and some metals stay locked inside the carbonate for good. The Mastery PRO DUO analysis in Part 10 tells you what’s actually in your water. Never lower pH on purpose. The natural drop during cycling is enough.
Reason 3: Protection Against Fish Parasites
The first fish go into the tank while salinity is still low. This is known as hyposalinity, a long-established, chemical-free method against external fish parasites. Most reef fish handle it well. It may even lower their stress, because they use less energy balancing salt in their bodies. Many parasites can’t survive it:
- Effective against: marine ich (Cryptocaryon irritans), most marine flukes, and some turbellarian worms (“black ich”).
- NOT effective against: marine velvet (Amyloodinium), clownfish disease (Brooklynella), Uronema, or bacterial infections.
⚠️ Hyposalinity supports quarantine. It does not replace it. Quarantine and observe all fish before they enter the display.
Not All Livestock Tolerates Low Salinity
- Never add invertebrates or corals at low salinity. That includes shrimp, snails, copepods and coralline algae. They only go in at full salinity: 1.026 SG (about 35 PSU).
- Only add fish known to tolerate low salinity. Use the list in Part 6.
- Clownfish: some do better at about 1.011 SG (about 14.5 PSU) than at 1.009 SG (about 12 PSU).
- If you’re unsure about a species, wait until the tank reaches full salinity.
Lower salinity quickly if you need to. Raise it slowly.
Notes:
- Your skimmer may produce little foam at low salinity. That’s normal, and it improves as salinity rises. Since skimming is weaker during this phase, keep the first fish load light.
- Low-salinity water has lower alkalinity, so pH drops more easily. In the fishless phase, this helps flush out pollutants (Reason 2). Once fish are in, check pH regularly and keep it stable.
Part 4: Cycling. Building the Biological Filter.
Step 1: Start the Cycle with AmmoMix and Nitri-Bac
Modern Reef AmmoMix is an ammonium chloride mixture made for fishless cycling of new aquariums with dry rock. It provides the ammonia that feeds the bacteria. Modern Reef Nitri-Bac provides live marine nitrifying bacteria, grown on a micro substrate, that process that ammonia.
Protocol:
- Dose AmmoMix: 1 drop per 1 litre of water.
- Then dose Nitri-Bac: 50 ml per 100 litres.
- Repeat AmmoMix every 3 days, 3 times, or until total ammonia reads 2 ppm.
- ⚠️ Never exceed 2 ppm ammonia. Too much ammonia can slow or stall the cycle.
- Keep adding Nitri-Bac until nitrite (NO2) starts to build. That shows the bacteria have established and are working.
- At the end of week 1, change all the water once to flush out pollutants (see Part 3, Reason 2). This full change is done only this one time. Later water changes are partial (step 7).
- Prepare the new water one day before. In a clean mixing container, mix RO/DI water and salt to the same low salinity: 1.009–1.010 SG (about 12–13 PSU). Run a pump and heater in it for at least 24 hours, so the salt dissolves fully and the water is stable. Just before use, check that salinity and temperature (26 °C) match the tank.
- Switch off the pumps, heater and skimmer before draining, so nothing runs dry. A hot heater can crack when it’s out of water.
- Drain the sump completely. Drain the display to just above the sand surface. The sand bed must stay underwater and undisturbed, because it holds a large share of the bacteria. Don’t stir or vacuum the sand.
- Work quickly so the rock doesn’t dry out. The bacteria growing on it must stay wet. If needed, spray exposed rock with tank water while you work.
- Refill slowly. Pour onto a rock or a plate so the stream doesn’t disturb the sand. Then switch the equipment back on.
- Restart the cycle. Along with the pollutants, the full change removes ammonia, nitrite and the bacteria floating in the water. The bacteria living on the rock and sand stay, so the cycle continues. Dose Nitri-Bac at 5 ml per 100 L. Then dose AmmoMix (1 drop per litre), test ammonia, and adjust (max 2 ppm).
- If pH drops below 7.0 at any point after this, do a 25% water change using water prepared the day before, at the same salinity (1.009–1.010 SG, about 12–13 PSU). Take the water from the top of the tank so you don’t disturb the sand bed.
About “NH3 / ammonium”: Most hobby kits measure total ammonia, meaning NH3 (ammonia) plus NH4⁺ (ammonium) together. The 2 ppm limit refers to that total reading.
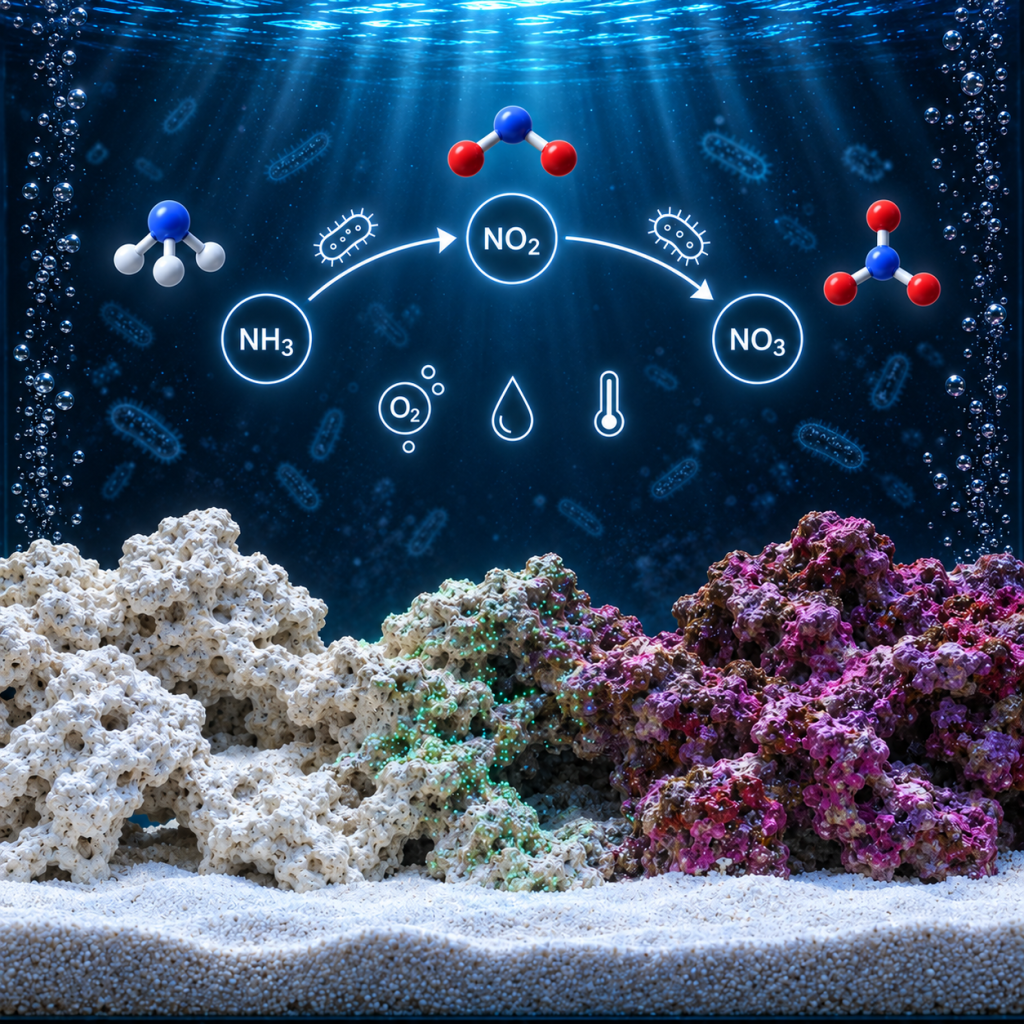
What to expect: Ammonia rises, then falls as nitrite rises. Then nitrite falls as nitrate (NO3) builds. This takes 2–4 weeks. Readings drop right after the full water change in week 1 and then build again. That’s normal. The cycle is complete when both ammonia and nitrite are undetectable.
Step 2: Add BIOBac from Day One
I also dose Modern Reef BIOBac from the start. It’s a full-spectrum blend of probiotic, nitrifying and purple (photosynthetic) bacteria. It supports nitrification and breaks down toxic ammonia and hydrogen sulphide. It also reduces odours, improves water clarity, helps clean the sand and rock, and reduces mulm and excess nutrients.
Dosage:
- Shake well. Add 1 ml per 100 litres, once or twice a week.
- Switch off UV, ozone and the skimmer for 2 hours after dosing.
- It works alongside Nitri-Bac during the first cycle. It can also be combined with BIODiversity and BIOActivator (see the BIOActivator guide).
- No refrigeration needed.
Step 3: Total Blackout for About 6 Weeks
I keep the lights off for about 6 weeks, or until nitrite reads low. I prefer to wrap the whole tank so it’s completely dark. Keep the tank covered during the week-1 water change too, as much as you can.
Why blackout?
- With no light, nuisance algae and cyanobacteria can’t use the high nutrient levels a cycle produces.
- Nitrifying bacteria don’t need light, so the biofilter develops without competition.
- Bacteria and microfauna colonise the rock and sand before algae can.
Step 4: Add BIODiversity When Nitrite Builds
In week 2, or as soon as nitrite starts to build, I start dosing Modern Reef BIODiversity. Start it after the full water change, so the dose isn’t flushed straight out.
A wide variety of microorganisms is essential in a reef aquarium. They act as micro armies that naturally out-compete and feed on common pests such as dinoflagellates and cyanobacteria. BIODiversity is a lab-engineered solution of many marine bacterial strains, microorganisms, minerals and nutrients. It boosts the whole microfauna chain, from bacteria to filter feeders and copepods. Corals benefit indirectly: a diverse microbial environment supports copepods and filter feeders, which makes the reef’s natural defences stronger.
Dosage:
- New aquariums: Shake well and dose 50 ml per 100 litres in a high-flow area. Repeat once after one week.
- Maintenance: 10 ml per 100 litres, once or twice a week. It works best when dosed together with live copepods and zooplankton (see Part 7).
- Cloudy water after dosing is normal.
If the Water Turns Milky: Add UV
If the tank turns milky or cloudy (a bacterial bloom), I add a UV steriliser. This can happen during the blackout or after it. The UV clears free-floating bacteria from the water without harming the bacteria growing on the rock and sand.
Confirming the Cycle
Before any fish go in:
- Ammonia (NH3/NH4⁺) is undetectable.
- Nitrite (NO2) is undetectable.
- Nitrate (NO3) is present. That proves the full nitrification chain is working.
- Optional ammonia challenge: Dose AmmoMix to about 1 ppm. If ammonia and nitrite both read zero within about 24 hours, the biofilter is ready.
Part 5: Ending the Blackout
Unwrap the tank and bring the lights back gradually. Start with a short photoperiod and low intensity, then increase both over the following weeks. Brown diatoms will almost certainly appear. That’s normal. They will feed the clean-up crew later.
Part 6: Adding Fish at Low Salinity, Then Raising Salinity
Fish First: Slowly, Hardiest First
Once the cycle is confirmed, I add the first fish while salinity is still low. I add them slowly, starting with the hardiest, so the biofilter can grow to match each new load.
Good hardy first fish (reef safe and tolerant of low salinity):
- Captive-bred ocellaris or percula clownfish (Amphiprion ocellaris / percula). See the 1.011 SG (about 14.5 PSU) note in Part 3
- Royal gramma (Gramma loreto)
- Firefish (Nemateleotris magnifica)
- Captive-bred neon gobies (Elacatinus spp.)
- Watchman gobies (Cryptocentrus spp.): they move sand, so place corals on rock rather than on the sand bed
Acclimation: Store water is usually at about 1.020–1.026 SG (about 26.5–35 PSU). Fish handle a drop to low salinity well, but drip-acclimate them over a few hours anyway. A gradual change is still gentler than a sudden one.
Dose Nitri-Bac at 5 ml per 100 L whenever you add new fish, after water changes, and after any treatment. Keep testing ammonia and nitrite. Any detectable reading means you’re adding fish faster than the biofilter can handle.
Switching the ATO to Saltwater
After the fish are in, I switch the ATO from RO/DI water to saltwater mixed at full reef salinity: 1.026 SG (about 35 PSU). Evaporated water is then replaced with saltwater instead of fresh water, so salinity rises slowly and naturally on its own.
Why this works so well:
- It’s very gradual. Fish, bacteria and microfauna all adapt without stress. For example, a 300 L system losing 3 L a day to evaporation rises by only about 0.35 PSU per day. Going from about 12 PSU to 35 PSU takes about 2 months. That’s well below the recommended maximum rise of 0.002 SG (about 2.6 PSU) per day.
- The fish get a long period at low salinity, which suppresses ich and flukes while the system matures.
- The biofilter adjusts gradually to rising salinity, with no shock.
Professional tip: For the full anti-ich effect, keep salinity at about 1.009–1.010 SG (about 12–13 PSU) for around 4 weeks after the last fish goes in. Then switch the ATO to saltwater.
⚠️ Critical: switch the ATO back to RO/DI water once you reach 1.026 SG (about 35 PSU). If you forget, salinity keeps climbing into hypersalinity. That harms fish and makes the tank unsafe for invertebrates and corals. Check salinity often during this phase.
If you want a faster rise, do partial water changes with full-strength saltwater (1.026 SG, about 35 PSU), prepared the day before. But always raise salinity slowly.
Prepare the Water Chemistry
As salinity rises, I bring KH, calcium and magnesium up to their target levels using single-element supplements: Modern Reef KH+, Ca+ and Mg+. I don’t start the full Reef Keeping System yet. This step prepares the water for invertebrates and coralline algae.
| Parameter | Target (at full salinity) |
|---|---|
| Salinity | 1.025–1.026 SG (about 33–35 PSU) |
| KH (alkalinity) | 7.2–8.5 dKH |
| Calcium | 390–440 mg/L |
| Magnesium | 1250–1400 mg/L |
| Temperature | ~26 °C |
At low salinity, all these levels are naturally lower in proportion. Raise them step by step as salinity rises, rather than forcing full reef values early. Remember that as pH and alkalinity rise, rock and sand start binding phosphate and metals again (Part 3). This is one more reason the early flush matters.
Part 7: Invertebrates and Copepods at Full Salinity
When to Add Invertebrates
I only start adding invertebrates once salinity reaches 1.026 SG (about 35 PSU) and algae, diatoms and biofilm are present to feed them. A clean-up crew added to a bare tank will starve. Invertebrates added at low salinity will die.
Recommended invertebrates (reef safe):
| Invertebrate | Role |
|---|---|
| Trochus / Tectus snails | Excellent film and diatom grazers. They can right themselves when flipped and often breed in the tank |
| Cerith snails | Graze glass, rock and the sand surface |
| Nassarius snails | Sand-sifting scavengers that eat leftover food |
| Stomatella snails | Night grazers that reproduce in the tank |
| Strawberry conch (Conomurex luhuanus) | Keeps the sand surface clean and turned |
| Cleaner shrimp (Lysmata amboinensis) | Scavenger and fish cleaner |
Algae-grazing fish (reef safe, add at full salinity):
- Lawnmower blenny (Salarias fasciatus): grazes filamentous algae
- Kole tang / Tomini tang (Ctenochaetus spp.): excellent film and diatom grazers. They need a properly sized aquarium
Acclimation: Invertebrates are very sensitive to salinity changes. Make sure the store water and your tank water closely match, and drip-acclimate slowly.
Live Copepods in Large Numbers
When I add the invertebrates, I also add live copepods in large numbers, especially benthic copepods. These species live on surfaces (rock, sand and glass) rather than swimming in open water. Harpacticoid species such as Tisbe and Tigriopus are good examples.
Why benthic copepods, and why so many?
- They graze biofilm, detritus, diatoms and microalgae on the surfaces where pest outbreaks start.
- They compete with dinoflagellates and cyanobacteria for space and food, and some eat them.
- They build a self-sustaining population in the rock and sand, which becomes natural food for fish, corals and filter feeders.
- Most reef fish eat copepods. A large starting population can establish itself before the fish eat most of it.
Dose BIODiversity alongside the copepods (10 ml per 100 L, once or twice a week). This is when it works best. The copepods and the microorganisms in BIODiversity support each other in building a diverse, competitive microfauna.
Tip: Add copepods in the evening with the pumps on low or briefly paused. This lets them settle into the rock and sand before the fish notice them. Repeat over the following weeks.
Part 8: Expect the Ugly Stages. This Is Normal.
Every new reef goes through ugly stages, even tanks that were started perfectly. They are normal, especially in the first year. Expect them, and don’t panic.
| Stage | What You’ll See | Why It Happens |
|---|---|---|
| Bacterial bloom | Milky or cloudy water | Bacteria multiplying rapidly in the water. UV and patience clear it |
| Diatoms | Brown, dusty film on sand, rock and glass | Silicate, new surfaces and fresh light after the blackout. Usually the first stage |
| Cyanobacteria | Red, burgundy or green slimy mats, often with bubbles | Unbalanced nutrients, low-flow areas, and microbes that haven’t matured yet |
| Dinoflagellates | Brown, snotty, stringy films with bubbles, often worse under light | Very common in new, “too clean” tanks with little biodiversity, often when NO3 and PO4 drop near zero |
| Green film or filamentous algae | Green coating on glass and rocks | Excess nutrients and light while the system is still balancing |
How to Get Through Them
- Build biodiversity. This is the best long-term defence, and it’s why this method adds bacteria, then microfauna, then copepods. A diverse system leaves pests nowhere to settle.
- Don’t let NO3 and PO4 drop to zero. Zero nutrients is a classic trigger for dinoflagellates.
- Keep the flow strong and random so there are no dead spots.
- Be stable and patient. Don’t make big changes or attack the problem with harsh chemicals. Many of these stages go away on their own as the system matures.
Modern Reef Support
Modern Reef makes several products that help these outbreaks happen less often and less severely.
BIOmix: Five Products in One Solution
BIOmix is Modern Reef’s solution for dinoflagellates, slime algae and cyanobacteria. It is made up of five products:
| Product | What It Does |
|---|---|
| BIOReef-Snow | A unique mixture of flocculants and sponge vitalisers. It neutralises undesirable acids and works against dinoflagellates, slime algae and cyanobacteria |
| BIOBac | A full-spectrum synthetic bacterial blend of probiotic, nitrifying and purple bacteria. It aids nitrification and breaks down toxic ammonia and hydrogen sulphide |
| BIODiversity | A lab-bio-engineered solution that diversifies and boosts the microfauna, creating a more vital reef immune system |
| BIOActivator | An all-in-one biological stimulant based on enzymes and bacteria food. It promotes microbiology, improves water clarity, and retains excess nutrients and contaminants |
| Nitri-Bac (optional) | A specialised nitrifying bacteria blend that enhances nitrification and promotes a healthy nitrogen cycle |
Note: BIOBac, BIODiversity and Nitri-Bac are already part of this method (Parts 4, 6 and 7). If you’ve followed the guide, these bacteria and microorganisms are already established. BIOmix builds on that base during an outbreak.
ReefBiome: Concentrated Microbial Support
ReefBiome is a concentrated dry microbial blend that helps reef aquariums stay biologically stable. It supports the natural breakdown of organic waste, which helps keep the water clear and clean.
These products shorten and soften the ugly stages, but they don’t replace patience. The ugly stages are part of the hobby. Each one you get through makes your reef more mature and stable.
Part 9: Coralline Algae. The Signal to Add Corals.
Inoculating Coralline Algae
Once the tank is at full salinity (1.026 SG, about 35 PSU) with stable KH, calcium and magnesium, I add coralline algae. I take it from:
- A friend’s clean, pest-free tank (scrapings or small pieces), or
- A clean, carefully inspected piece of live rock. Inspect it under magnification, dip it, and remove anything suspicious.
Why I Wait for Coralline Algae
My rule is simple: I don’t add any coral until I see coralline algae clearly growing on surfaces. There are two reasons.
1. Coralline algae shows that conditions for calcification are right.
Crustose coralline algae (CCA) builds its skeleton from calcium carbonate, just like corals do. It only grows well when alkalinity, calcium, magnesium and water quality are stable and balanced. When CCA spreads across rock and glass, it shows the tank is ready for calcifying life like corals.
2. Coralline algae helps a reef “invite” corals.
On natural reefs, coral larvae choose where to settle partly based on chemical signals from CCA and the bacteria living on it. For example, research has shown that Pseudoalteromonas bacteria living on coralline algae produce a compound called tetrabromopyrrole. This compound triggers coral larvae of Acropora and several Caribbean species to settle and transform into young corals. Studies also show corals settle much better on surfaces covered by a mature biofilm and CCA.
In short: in nature, coralline algae and its biofilm send a biological message to corals: “this is a good place to live.”
These studies are about coral larvae settling, not fragments placed by hand. But the same idea applies in the aquarium. Rock covered in coralline algae shows a mature, balanced, reef-like environment that’s ready for corals.
Part 10: Water Analysis Before Corals
Once coralline algae is established, I run a Modern Reef Mastery PRO DUO analysis. It’s a laboratory ICP-MS/OES analysis of the tank water, plus an analysis of your osmosis (RO/DI) water. I run it alongside regular hobby tests for nutrients.
Testing both waters together shows the full picture. It tells you what’s in your tank, and whether a problem comes from the tank itself or from the water you put into it.
Nutrients
- Nitrate (NO3) and phosphate (PO4) must be present and detectable, not at zero. Corals need nutrients, and zero nutrients invite dinoflagellates.
- Typical working range: NO3 around 2–10 mg/L, PO4 around 0.03–0.10 mg/L. Polypop works best with PO4 at about 0.03–0.04 mg/L or higher.
Elements Linked to Coral Health and Immunity
- Iodine (I): linked to coral stress response, antioxidant protection and tissue health
- Bromine (Br): a halogen found in natural seawater and used in coral and microbial chemistry
- Fluorine (F): built into coral skeletons
- Zinc (Zn): needed by many enzymes, including carbonic anhydrase, which is central to calcification
- Sulphur (S): a major seawater ion, and part of amino acids and coral metabolism
Other Elements Worth Checking
- Potassium (K): affects coral tissue, colour and tip health
- Strontium (Sr): built into coral skeletons alongside calcium
- Boron (B): helps buffer seawater
- Trace metals: iron (Fe), manganese (Mn), molybdenum (Mo), nickel (Ni), cobalt (Co), chromium (Cr) and vanadium (V). They matter for zooxanthellae, coloration and metabolism
- Lithium (Li) and barium (Ba): check for both deficiency and excess
- Copper (Cu): needed in tiny amounts, toxic when elevated
- Contaminants: aluminium (Al), tin (Sn), lead (Pb) and antimony (Sb). These can come from rock, salt, equipment or poor RO/DI water. Tin often comes from new PVC pipes and fittings. This is what the week-1 full water change in Part 3 is designed to reduce
- Silicate (Si): high levels fuel diatoms. Silicate often enters through the source water, so check your osmosis water too. The Mastery PRO DUO includes an osmosis analysis, so you can catch silicate and other pollutants before they reach your tank
Correcting Deviations: The One-Liquid Solution
Based on your analysis results, our laboratory makes a One-Liquid Solution. This is a laboratory formula made for your tank, designed to correct the deviations found in the analysis.
Apply it with a doser, exactly as our laboratory instructs. It gives you one targeted correction, instead of many separate supplements and guesswork.
Tip: For the most complete picture, also run a Mastery PRO DUO just before the week-1 full water change. It shows you what your rock, sand and equipment have released, and whether your osmosis water is clean from the start. Keep in mind that results at low salinity (about 12–13 PSU) will show all elements lower in proportion than at full salinity.
Part 11: Starting the Reef Keeping System
Now I start the Modern Reef proportional consumption system, matched to the corals you plan to keep.
SPS / Acropora-Dominant and Mixed SPS/LPS Reefs
- Modern Reef Proportional Consumption RKS (the 4-part system)
- Complete Reef Fuel
- Polypop
- Reef Terraformer (optional)
For SPS-dominant tanks, Acropora-heavy reefs and other systems with high consumption, the 4-part RKS generally gives the best stability, coloration and growth. It combines organic and inorganic dosing.
LPS, Soft Coral and Mixed LPS/Soft Reefs
- Modern Reef ONE-4Reef (all-in-one, single container)
- Complete Reef Fuel
- Polypop
ONE-4Reef suits reefs with low to moderate consumption: LPS-dominant tanks, soft coral tanks, and mixed LPS/soft systems. Start at 4 ml per 100 L per day and adjust based on KH tests.
Important: ONE-4Reef is a form of organic carbon dosing, so it can lower NO3 and PO4. Monitor nutrients regularly, and use Modern Reef N+ and P+ if they drop too low. If you use another carbon source (such as C+), reduce or stop it while using ONE-4Reef.
If all the basics are in place, you have successfully started a reef aquarium.
Part 12: Coral Quarantine. Protecting the Clean Start.
This method only works if you protect what you’ve built. Every coral must be quarantined. Only the coral itself goes into the display, never the plug or the rock it came on.
Protocol
- Dip each coral in a quality coral dip on arrival.
- Inspect under magnification for pests: Acropora-eating flatworms, Montipora-eating nudibranchs, red bugs, Aiptasia, pest snails and egg clusters.
- Remove the plug or base rock. Cut the coral free, keeping only living tissue and clean skeleton.
- Quarantine in a separate system for several weeks, at the same salinity as the display (1.026 SG, about 35 PSU). Repeat dips and inspections to catch eggs that hatch later.
- Seal it. Use cyanoacrylate (gel superglue) to seal any pores, holes or crevices where something could still be hiding.
- Mount it on a clean plug, or directly on the aquascape.
For Euphyllia and Other LPS
I know this is the hardest part. If you keep Euphyllia (torch, hammer, frogspawn) or other LPS, cut away as much of the base skeleton and rock as the coral allows. Scrub everything that remains, and seal any spot that could hide life with cyanoacrylate. It takes effort and care, but it’s worth it.
If you skip this step, you will eventually end up with Aiptasia, problem algae and unwanted critters. If there’s a definition of a professional reef start, this is it.
Timeline Overview
| Phase | Timing | Key Actions |
|---|---|---|
| Setup | Day 0 | Dry rock, aragonite sand, 1.009–1.010 SG (about 12–13 PSU), 26 °C, flow and skimmer running, tank wrapped for blackout |
| Cycle start | Day 1 | AmmoMix (1 drop/L) + Nitri-Bac (50 ml/100 L) + BIOBac (1 ml/100 L) |
| Ammonia building | Days 3–9 | Repeat AmmoMix every 3 days, 3 times (max 2 ppm). Keep adding Nitri-Bac until NO2 builds |
| Prepare new water | Day before the end of week 1 | Mix the full water volume at 1.009–1.010 SG (about 12–13 PSU), with a pump and heater running for at least 24 hours at 26 °C |
| Pollutant flush (one time only) | End of week 1 | Optional Mastery PRO DUO analysis first. Equipment off. Drain the sump completely and the display to just above the sand. Keep the rock wet. Refill slowly with the prepared water. Then Nitri-Bac 5 ml/100 L + AmmoMix 1 drop/L. Re-test ammonia (max 2 ppm) |
| Nitrite phase | ~Week 2 | Start BIODiversity (50 ml/100 L), repeat after 1 week |
| Cycle completion | Weeks 2–6 | Wait for NH3 and NO2 to be undetectable. UV if water turns milky. 25% water change (prepared the day before, same salinity) if pH drops below 7.0 |
| End of blackout | ~Week 6 | Confirm the cycle. Bring lights back gradually. Diatoms appear |
| Fish at low salinity | After blackout | Hardy, reef-safe, quarantined fish that tolerate low salinity, added slowly. Nitri-Bac 5 ml/100 L with each addition |
| Salinity rise | After fish (ideally after ~4 weeks at 1.009–1.010 SG, about 12–13 PSU) | Switch ATO to saltwater at 1.026 SG (about 35 PSU). Slow natural rise (max 0.002 SG, about 2.6 PSU, per day). Adjust KH/Ca/Mg with KH+, Ca+, Mg+ |
| Full salinity | At 1.026 SG (about 35 PSU) | Switch ATO back to RO/DI water |
| Inverts and copepods | At 1.026 SG (about 35 PSU) with algae present | Reef-safe clean-up crew + large numbers of benthic copepods + BIODiversity maintenance dose |
| Ugly stages | Throughout year 1 | Diatoms, cyano and dinos are normal. Use biodiversity, patience, and BIOmix or ReefBiome if needed |
| Coralline | Once stable | Add coralline algae from a clean source |
| Coral readiness | Coralline visibly growing | Mastery PRO DUO analysis (tank + osmosis water). One-Liquid Solution in a doser, as the laboratory instructs. Start RKS or ONE-4Reef + Complete Reef Fuel + Polypop |
| Corals | After quarantine | Add quarantined, plug-free, sealed corals |
Final Words: There Is No Such Thing as Fast Cycling
There is no shortcut in this hobby, and this hobby rewards the patient. Patience starts with cycling, and cycling largely decides how successful your reef will be in the long term. The ugly stages will come. Patience and biodiversity will take you through them.
The easy road is always a bad road, in life and in a hobby.
“A thriving reef’s success is built on the effort at the start. Taking the easy path threatens progress more than any hardship.”
Akil, Modern Reef & Euro Corals

Thank very much for taking the time to walk us through the apprperiate approach for starting reef tank
Information is valid for established tank as well 🙂